Autism - Sensory Integration
Activities to Develop Visual Spatial Knowledge: Mental Map of Body
Leonard J. Press, O.D., FAAO, FCOVD
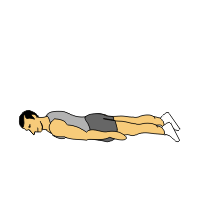 We’ll continue with Chapter 1 of Dr. Wachs’s VT Manual by addressing the mental map of the body through body lifts. An improved mental map allows the patient to move one part of the body in isolation without motor overflow, then to move multiple parts in unison, and then in a specific sequence. The patient lies prone on the floor, arms at his side, and the therapist touches the part or parts to be moved. Before this phase is attempted, the patient should have integrated over 75% of each of the primitive and postural reflexes. The following body lifts are listed in hierarchical order, meaning that one should be accomplished successfully before the next is attempted.
1. One Body Part – major, such as head or arm
2. Two Body Parts – homolateral
3. Two Body Parts – contralateral
4. One Body Part – specific, such as shoulder or elbow
5. Three Body Parts – simultaneously
6. Sequence – touch two and then three body parts, asking the patient to lift and lower them in the sequence touched. There is sequential motor memory involved here, as well as motor planning in programming and executing the movements. Once accomplished, ask him to lift the parts in the reverse order in which they were touched. If these activities are too difficult to perform when the patient is lying prone, then try it with the patient supine or on his back. In all of the phases above, watch for motoric stuttering, or lack of fluidity.
Silhouette – ask the child to stand facing a chalkboard, and trace the outline of his body on the board.
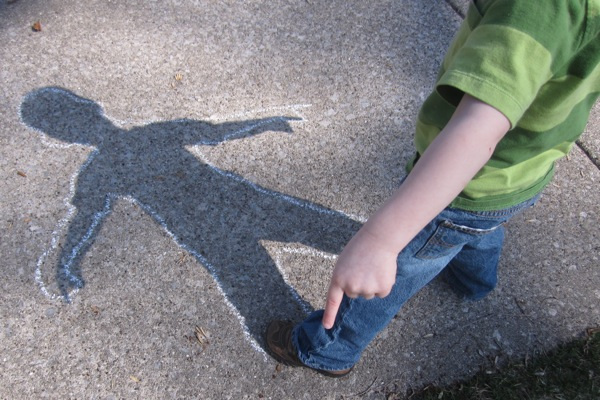
This is a chalk drawing on the pavement created from back-lit shadow, but you get the idea. Tell the child that the drawing represents the back of his body. Stand behind him and touch his back with your index finger. Ask him to draw an X on the chalkboard silhouette where he thinks you touched him. If this is too difficult, tap the child on the head or shoulder rather than the back. After he’s able to localize correctly, do a sequence and ask him to reproduce the sequence on the chalkboard. As with the body lifts, once he’s able to reproduce the sequence correctly, have him do the sequence in reverse order. When this is done, instead of individual taps, trace a figure on the child’s back, such as a triangle, and he should be able to reproduce that. As a variation, if one works with more than one child at a time, after you tap the child on the back, he has to reproduce the tap on the back of another child, who then has to map it onto the chalkboard.
 Joints – this procedure helps a child get in touch with the hinges and pivot points of his body that allow him to twist, turn, and bend. He stands in an upright position imagining that his feet are glued to the floor. He can move any part of his body except his feet. Hold a two foot dowel or yardstick about two feet in front of the child and move it toward him. He has to decide how to move his body in order to avoid being touched by the stick without moving his feet. Have him explore different possibilities. In essence this is motor visualization. Bring the dowel in from different angles and sides. The goal is flexibility in problem solving, rather than speed.
Dimensions – our goal now is for the child to develop internal knowledge of his own dimensions, and how to project that into space. First, stand across the room and hold a dowel parallel to the child, and ask him to tell you to raise or lower it until it is level with his waist; then repeat the space match for knees and shoulders. If he has trouble judging, move closer. As a variation, ask the child to judge at what level of his body a fixed object in a room would intersect. For example, if there is a round table in the center of the room, at would the edge of the table be at his waist, above it, or below it as he walked up to the table?
Estimating Body Length – with the child standing, ask him if he were lying down, how many of him would it take to get from his position to the wall. If the child is 5 ft. tall, and he is 15 ft. from the wall, it would take three of him to make cover the distance. You don’t want him to “count tiles” on the ceiling or use known calculations. The idea is to visually inspect the space, get a sense of his body dimension, and estimate the relationship.
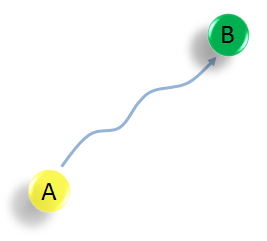 Estimating Distance – same idea, but with asking the child how many steps it would take to get from Point A to Point B. Compare the estimation with “normal” vs. “small” vs. “large” steps. Introduce a temporal component by asking the child to estimate how many of each type of step it would take to traverse the distance if he were walking slow vs. fast. Obviously a child has to have sufficient cognition to be able to conceptualize this, but it’s a great visual thinking prelude, perhaps even a readiness skill to solving math word problems.
Body Questions – as another variant, how close would a child have to come to a wall before his outstretched arm would touch the wall?
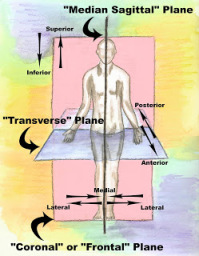 There are further variations in the book related to coordination of body ares and integration of body components. Dr. Wachs maps it out as the vertical as X axis, horizontal as Y axis, and transverse as Z axis. Some of these procedures are also available in his ICDL chapter, and in Thinking Goes to School, but the Visual/Spatial Portals text will give you more details.